Rocks and Cliffs Scenery
How to create scenery using the paper model set "Rocks and Cliffs"
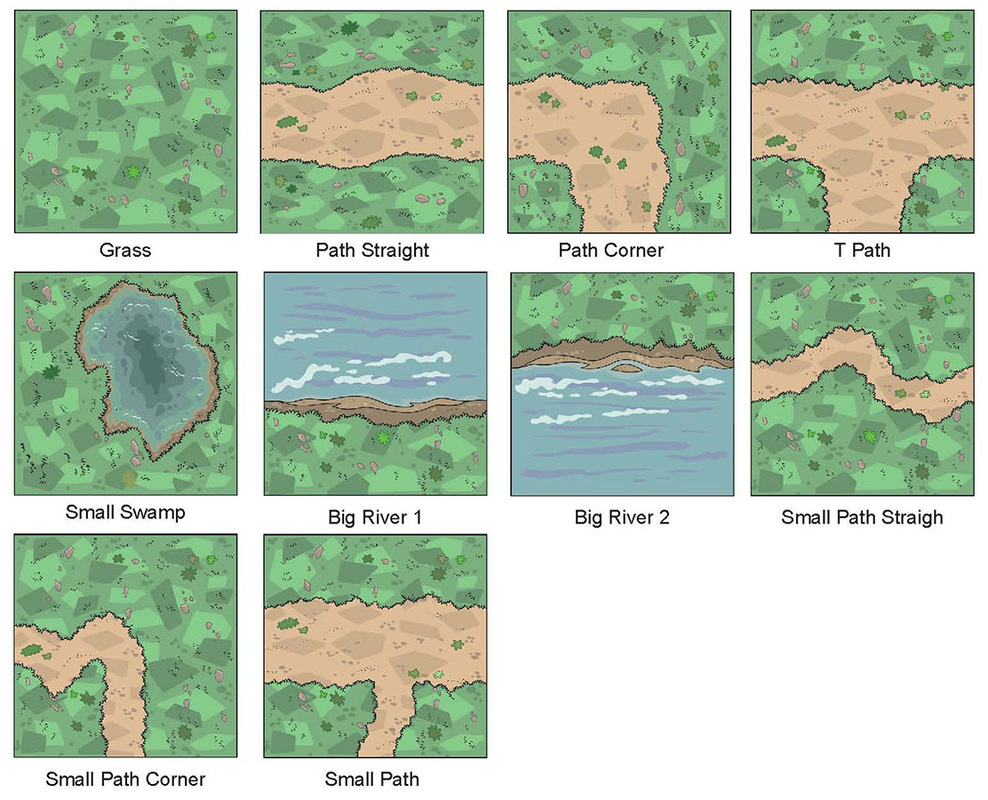
Step 1 - choosing the Terrain Tiles
To start, download, print, and assemble the Terrain Tiles you will use, choosing from the variety of Terrain Tiles available: plain grass area, different paths, river, etc.
Download the Terrain Tiles files here
http://www.mylittlehouse.org/terrain-tiles.html
http://www.mylittlehouse.org/terrain-tiles.html
Step 2 - Rocks and Cliffs
Next, download, print, and assemble the Rocks and Cliffs set. You can choose between two colors, grey or brown. Begin positioning them (not gluing them at this time) to create your scenery. The scenery can be however you like, small rocks by a river, a background hill, or as show in the pictures below, a narrow passage between cliffs to illustrate the maze from the Dino comic "Hidden Dinosaur Valley".
Download the Rocks and Cliffs files here
http://www.mylittlehouse.org/rocks-and-cliffs.html
http://www.mylittlehouse.org/rocks-and-cliffs.html
Step 3 - Planning your scenery
After assembling a few pieces, set them on your scenery, making sure there is adequate room for your MiniPeople to walk through where necessary. When creating your scenery, use your imagination; put yourself in the place of your characters and consider how things would look to you. Look at it from the ground level.
Take your time, have fun, enjoy creating your landscape, and try out a variety of positions. One set of Rocks and Cliffs can be place in a multitude of different ways.
Take your time, have fun, enjoy creating your landscape, and try out a variety of positions. One set of Rocks and Cliffs can be place in a multitude of different ways.
For this scenery I chose to build a simple passage between high cliffs, using the idea from the Dino comic story "Hidden Dinosaur valley" where the heroes meet the young girl and where the villains encounter the giant spiders. I printed 3 plain grass Terrain Tiles and one with the small swamp. Then I printed 2 copies of the Rocks and Cliffs plus one extra page.
NOTE: Notice I left a small entrance open on all four sides of the scenery. This allows me to position it in a variety of ways if I need to place it close to the entrance of the valley, the one with the two statues. of course, it can also be used separately and later on I can expand this part and add other rocks and cliffs.
I glued the four tiles together, but you can also glue rocks and cliffs on each terrain tiles and keep them separate in order to create different scenery each time you play or assemble your model.
Step 4 - the cliff maze part 1
When you are happy with your setting, start gluing the main rocks and cliffs onto the terrain tiles, starting with the bigger ones, then adding the smaller rocks to add extra details to your scenery, filling up small holes or stacking them up, and if you need more, simply print out an extra page.
You can see on the photos below that I added a tree that you can also download from the MiniWorld scenery folder. Be careful not to add too many rocks and clutter to your scenery, you need room to move your MiniPeople around.
You can see on the photos below that I added a tree that you can also download from the MiniWorld scenery folder. Be careful not to add too many rocks and clutter to your scenery, you need room to move your MiniPeople around.
Download the trees file here
http://www.mylittlehouse.org/trees.html
http://www.mylittlehouse.org/trees.html
Step 4 - the cliff maze part 2
Now for another fun part: add foliage and hanging roots to your scenery. You can download the foliage and the hanging roots template and print them out on different colors of paper (in order to have color on both side). You can also use a variety of tones of green, yellow, orange and red, etc, to give a summer or autumn color to your model.
When adding them to your scenery, try to imagine where plants would grow, such as in small cracks between rocks, hanging from the top of the cliffs, etc. And of course, if you are creating a jungle scenery, you will need to add more. Again be careful to not over crowd your scenery or no one will be able to pass through, though it may be intentional if you are hiding a secret passage or a cave.
When adding them to your scenery, try to imagine where plants would grow, such as in small cracks between rocks, hanging from the top of the cliffs, etc. And of course, if you are creating a jungle scenery, you will need to add more. Again be careful to not over crowd your scenery or no one will be able to pass through, though it may be intentional if you are hiding a secret passage or a cave.
Download the foliage and hanging roots file here
http://www.mylittlehouse.org/leaves-and-roots.html
http://www.mylittlehouse.org/leaves-and-roots.html
Other Tips
- Stretch some cotton between some rocks to imitate a spider web, then add a spider behind it.
- Cut long strips of green or brown paper to glue between trees or rocks to imitate vines growing, and add moss hanging from it.
- To decorate your models, you can also use scenery accessories such as grass, bushes, small rocks, etc, using scenery created for model railroad or other diorama models or RPG accessories (role playing game) to create landscape, etc. You can find tutorial on the internet on how to use these and where to purchase them, of course these accessories are more expensive than making your own with paper.
